Let's Build a Personal Frontend Portfolio - Preparation
Introduction
As I graduate from university, I will soon looking for a full-time job, so I urgently need a platform to showcase my work. Since I am a frontend developer, why not create a portfolio website myself? Creating my own portfolio is an essential experience and a very interesting journey.
Having a good plan can save a lot of time. I previously wrote an article reflecting on mistakes: Learning to Manage a Website from My Mistakes. In this series, I will share the techniques and processes of creating a portfolio. You only need to have “basic HTML and CSS knowledge” to complete a beautiful and practical personal portfolio. In the first episode, we won’t discuss technical part; we’ll start with preparation and planning!
Step 1: Market Research
First, you can visit others’ portfolios, record their strengths and weaknesses, and apply them to your own website. This not only provides inspiration but also can motivate you to complete a piece of work that belongs to you (I am someone who feels inspired to create when I encounter beautiful things):
- MUUUUU - Reference from a Japanese website
- Awwwards - Reference from an English website
- Portfolios - Reference from portfolio websites
- Portfolios of colleagues, peers, or friends
Step 2: Set Goals
Start thinking about what the most important goal of the entire project is. What solutions do you intend to propose? What will the user experience flow generally look like? Using scrap paper and a pencil, jot down your general ideas:
- Problem: Let others recognize the value you bring, leading them to want to collaborate with you to create benefits.
- Method: Allow people to view your work to understand your experiences and abilities.
- Process:
- Showcase the value you can bring to others.
- Showcase your personal characteristics.
- Showcase how to contact you.
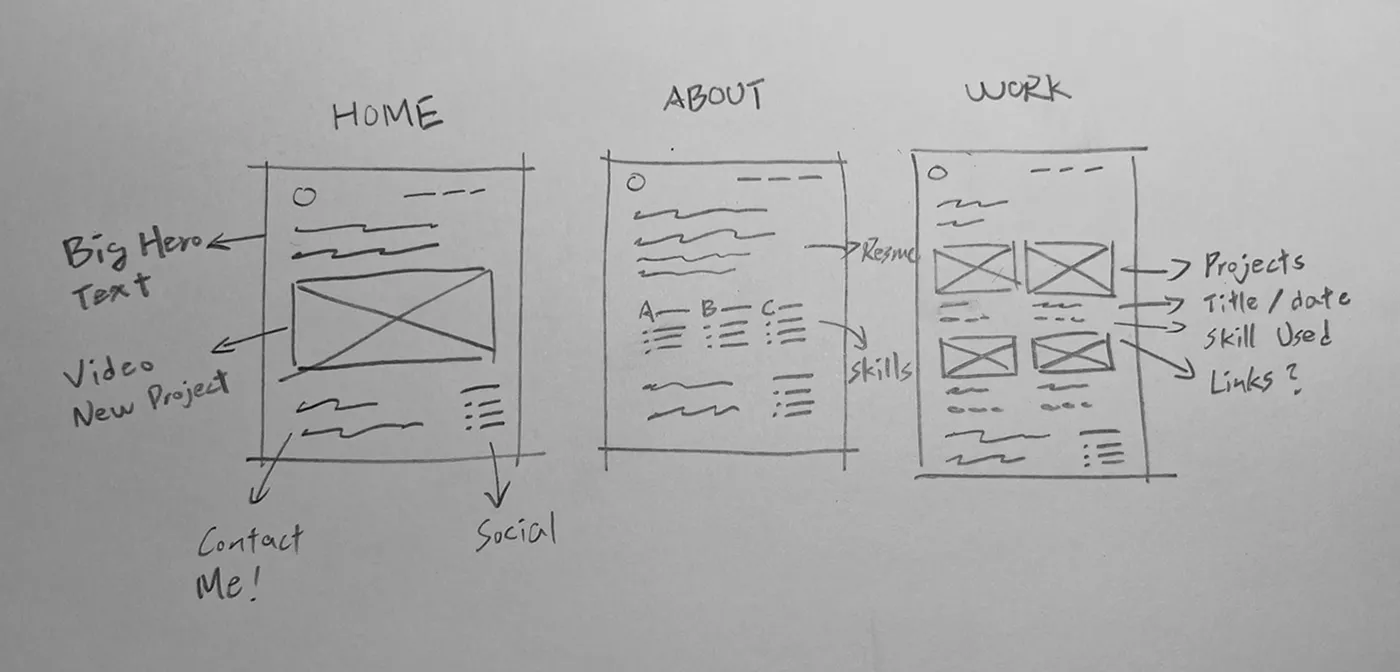
Write down the core purpose of each page and roughly sketch the website layout:
| Page | Purpose |
|---|---|
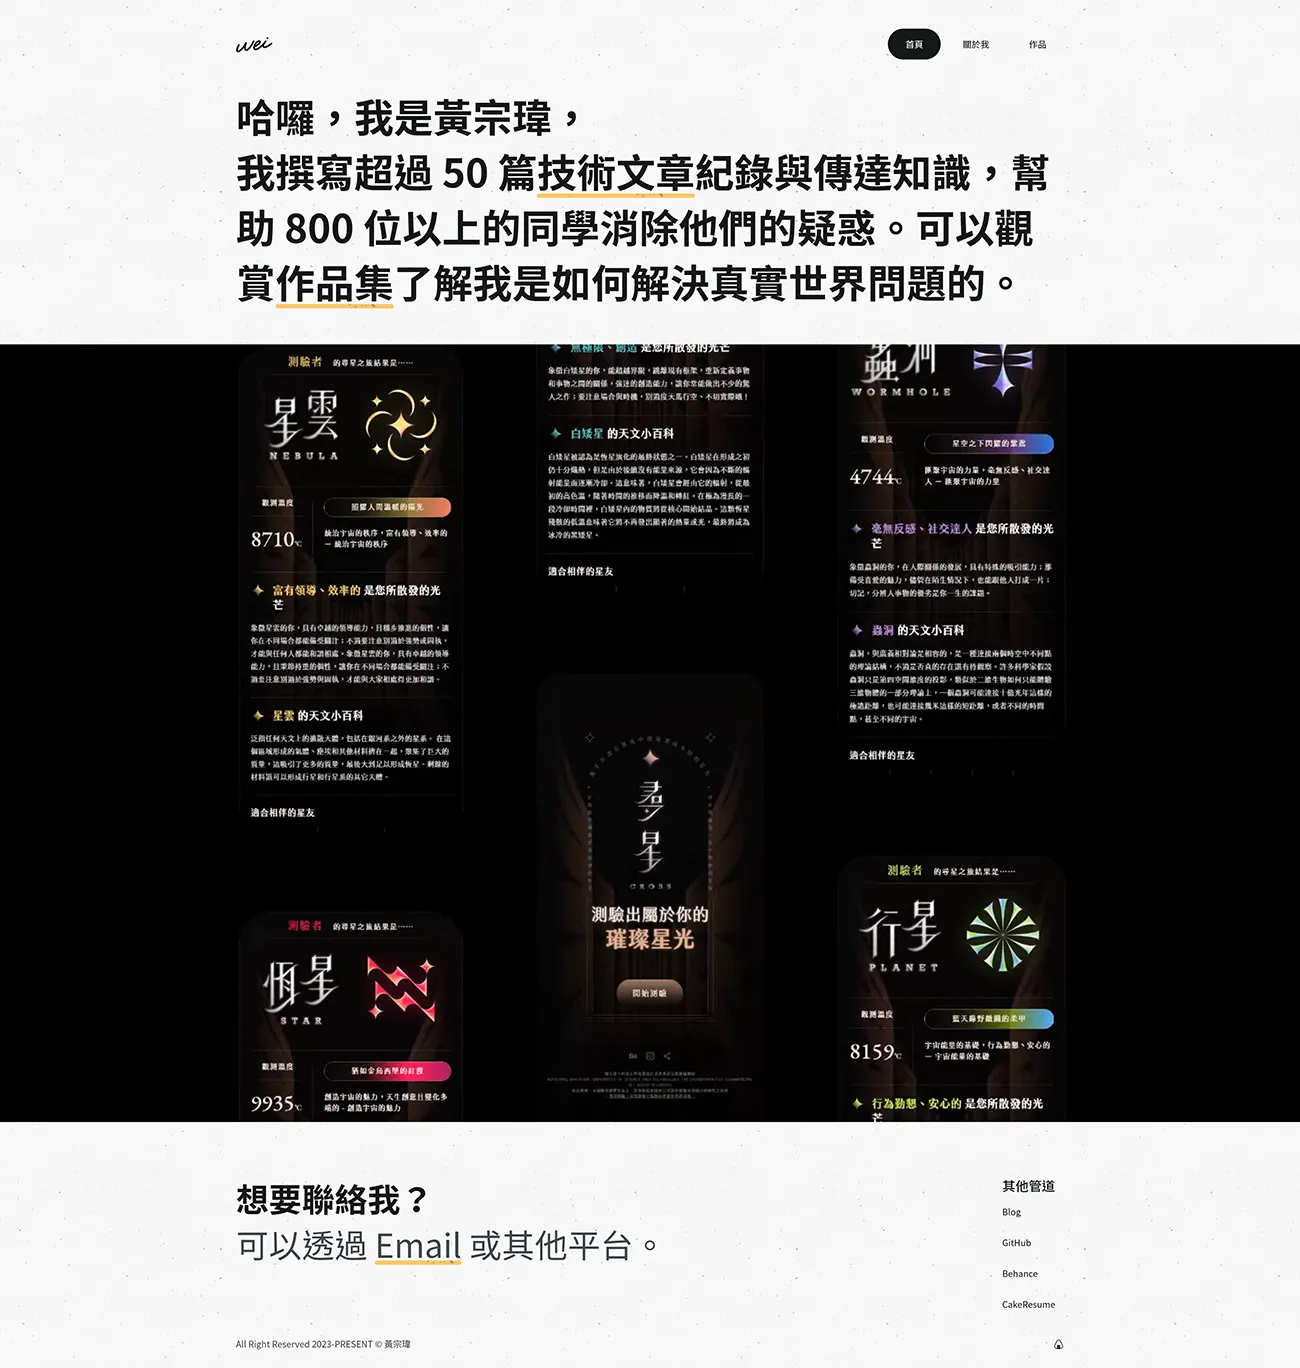
| Homepage | A simple sentence that lets people understand what I am passionate about and my expertise to spark interest, preferably with a call to action link directing to the work page, and a large image or video showcasing the best and most eye-catching project so far. |
| About | A more detailed self-introduction, including conveying my values, professional skills, experiences, etc. |
| Works | A series of small cards showcasing works, displaying the work title, date, brief description, technologies used and links. |
| Contact | Ensure that viewers can be influenced by a call to action at the bottom of each page, directing them to other social media or websites. (Placed at the bottom of each page) |
You can refine the draft as needed. If you are not a designer, I believe that at this stage, it is already sufficient to create a viable product. Getting too caught up in minor design choices too early is not a good thing.
Step 3: Detail Settings
With the website structure diagram in hand, you can start brainstorming the details of the entire brand, such as core values, copywriting, and design systems. While it’s good to plan them in detail, the primary goal now is to get the works up, even if it’s just acceptable.
It can be noted that people have several ways to create their own brand, such as using real names or nicknames, or even coming up with an additional name. Chinese pinyin URLs are not easy to remember, and there are many ways to confuse different pinyin, so I chose the last character of my name: “瑋” + “World Wide Web” = “Wei Wei Web” to represent myself on the web. Here, I believe that any name that can represent oneself is sufficient, and there’s no need to think too much about it 😅.
Copywriting
The planning of copywriting is best supported by actual achievements, so there’s no fear of it being mere empty talk. It shouldn’t feel hollow or vague, and it should detail the efforts made to overcome difficulties encountered in the process. Here are some examples:
Refine
Recruiters usually don’t have much patience to view every piece of work. I intentionally condense any explanations into 2 to 3 sentences, focusing only on the key points. It’s best to use the “from problem to solution” model to showcase your contributions and value, while some detailed explanations can be omitted.
- What is this?
- What problems were encountered?
- How did you solve it?
- What benefits did it bring?
Design is a process of “exploring the unknown” and “gathering the key”! The “star-seeking” represents the process of “exploring the key.” In personal, team, client, market, or societal contexts, this is a progressive journey, seeking consensus through the collision and fusion of many designers’ thoughts, continuously improving and accumulating experience like the Fibonacci sequence, moving towards our common goal. At the end of this journey, celestial bodies serve as the key goals pursued in life; regardless of whether the future is covered by darkness, this dazzling starlight cannot be obscured.
Through psychological tests, we explore the journey of cooperation and consensus-seeking between people, allowing participants to understand their possible positioning and ability trends within the team, achieving testing performance for tens of thousands of people to date.
Quantifying Results
Actively express through actions, and you can also insert some links (including call to action buttons) to provide readers with a way to further verify and learn more.
- I love learning new technologies and enjoy sharing.
- I like programming to solve problems.
I have written over 50 technical articles to document and convey knowledge, helping more than 800 students eliminate doubts.
You can view my portfolio to understand how I solve real-world problems.
Watch for Typos
In resumes or portfolios, double-check the names of technologies to ensure that proper nouns and typos are correct, to avoid being misunderstood as careless.
- Javascript
- Jquery
- Github
- SASS
- JavaScript
- jQuery
- GitHub
- Sass
Visuals
If you don’t have a design background, it’s advisable to achieve “functionality” first before considering “personalization and decoration.” Everyone has different interpretations of beauty and style, just like some people love spicy food while others hate it; there are no absolute rights or wrongs. However, maintaining a clean and professional image is usually the most universal strategy. Start simple, and if you want to add personal touches later, you can supplement them. I used the familiar Tailwind and utilized its default design system, with some simple customizations to the colors.
Additional: Assessing the Timeline
In this case, my expectation is to organize and complete the portfolio within a few days, at most within a week. Everyone’s situation is different, so it’s essential to assess one’s abilities and timeline first to make reasonable plans.
No matter how grand the vision or how high the enthusiasm, one must remember the “Minimum Viable Product Principle,” first achieving the most basic requirements, and then gradually expanding functionality. I am not particularly good at planning, which led me to spend an entire summer creating several bad web pages before realizing this principle. Set a shorter deadline for yourself, focusing on the overall structure’s completeness rather than getting caught up in a few small details, allowing for results to be seen early in the development phase and feedback to be adjusted in a timely manner.
I estimate that the first 30% of the overall development timeline should be spent on completing the overall structure, which will bring much peace of mind, Since the execution and power in the early stages will be high, and it won’t feel too tiring.