Establishing the Project
This article will use my own portfolio website as an example, utilizing Astro.js as a static generator to efficiently manage and generate all pages within the website, taking this opportunity to showcase the usability and power of this framework. Before starting, you can read the previous article: Let’s Build a Personal Frontend Portfolio - Preparation to plan the entire portfolio in advance, or set up a suitable development environment: Setting Up ESLint and Prettier for Astro .
First, use the Astro creation tool in the terminal to initialize and decide on your settings:
# Create an Astro projectnpm create astro@latest
# Ask if you want to install the create-astro package, enter y to confirmNeed to install the following packages:Ok to proceed? (y)
# Where do you want to create a new project? (./project name)Where should we create your new project?./dangerous-debris
# How would you like to start your new project? (Introduce sample files / Import blog template / Blank)# Select blankHow would you like to start your new project?- Include sample files (recommended)- Use blog template> Empty
# Install dependency archives? (whether)# Select YesInstall dependencies? (recommended)- Yes - No
# Planning to use TypeScript?# Select YesDo you plan to write TypeScript?- Yes - No
# TypeScript mode? (Strict/Most Strict/Loose)# Choose the most rigorousHow strict should TypeScript be?- Strict (recommended)> Strictest-Relaxed
# Initialize a Git repository? (Optional)# Select YesInitialize a new git repository? (optional)- Yes - NoOnce the project is set up, you can cd ./project-name to enter the project, use npm run dev to start the development server, and use ctrl+c to close it.
Astro Basics
Before writing the website, there are some knowledge points about Astro that need to be filled in, but it won’t be too complicated. Here, I will briefly introduce them:
Project Structure

Now, when you start the development server, you will find that apart from the “Astro” title, there is nothing else on the screen. This is because the empty project was chosen earlier. The project contains different default generated files and folders, each with its own purpose:
src/*: Project source codepublic/*: Unprocessed resources (exactly the same as Vite public, static resources can be placed here)package.json: Records project package informationastro.config.mjs: Astro configuration filetsconfig.json: TypeScript configuration file
Routing
Creating pages in Astro.js is very simple. It is based on file routing, allowing you to directly write .astro, .html, .mdx, or .md files and place them in folders. During generation, corresponding static pages will be created based on the file names and locations. For example:
- Creating a new file:
src/pages/foobar.astrois equivalent to creating a new page under/foobar. - Creating a new file in the hello folder:
src/pages/hello/world.astrois equivalent to creating a new page under/hello/world.
Component Scripts and Templates
---// Component Script (JavaScript / TypeScript)---
<!-- Component Template (HTML + JS Expressions) -->
The beginning of an .astro file will have three dashes, referred to as the “Component Script.” The content inside the dashes will be executed when the Astro component is created. For example, you can:
- Import other Astro components
- Import other frameworks, like React
- Import other data, like JSON
- Fetch third-party data
- Create variables for use in templates
The block below the dashes is the “Component Template,” where you can write HTML. To use the data from the component script in the component template, you can use syntax similar to JSX. For example, you can convert an array into an HTML list using the map method:
---const items = ['A', 'B', 'C'];---
<ul> {items.map((item) => <li>{item}</li>)}</ul>
At this point in the tutorial, you should realize that what you need to do is write basic HTML and JavaScript. You have already grasped the power of the .astro file!
Creating Pages
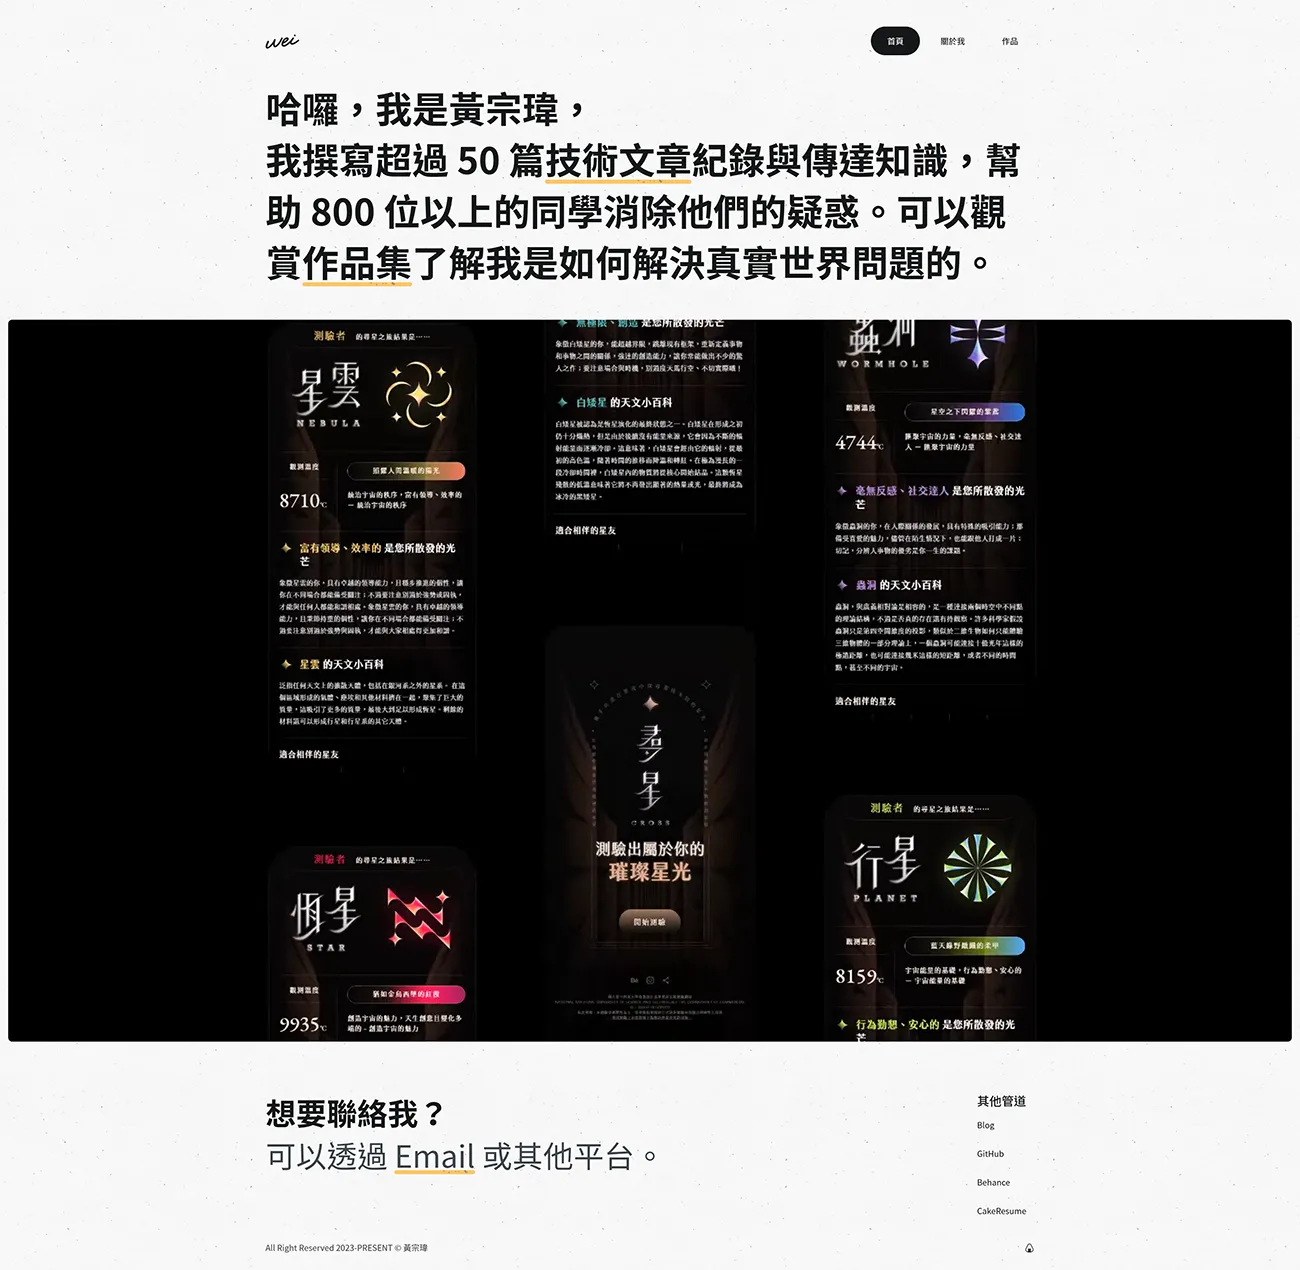
A website usually has many repetitive segments. Using the methods learned earlier, you can break the webpage into component files that can be imported when needed. Here, I created a Base component for the overall website, which includes references to the Navbar and Footer components, as well as the Banner component at the top of the page.
---import Base from '@/layouts/Base.astro';import Banner from '@/components/Banner.astro';---
<Base title="Home">  <main class="min-h-auto md:min-h-screen">    <Banner>    <h1 class="px-4 font-semibold text-3xl md:text-6xl">    Hello, I am Joe,<br />    I have written more than 50 <a class="highlight" href="https://www.webdong.dev/post/">technical articles</a> to record and convey knowledge, helping 800    Please help more than 100 students to clear their doubts. Check out my <a class="highlight" href="/work">portfolio</a> to see how I solve real-world problems.    </h1>    </Banner>
    <section class="mb-16">    <h2 class="sr-only">Latest Works</h2>    <div style="background-color: black;" class="mx-4 flex aspect-video justify-center rounded-lg">    <video class="h-full w-full" width="720" height="540" autoplay loop muted playsinline poster="">    <source src="/assets/global/hero.webm" type="video/webm" />    <source src="/assets/global/hero.mp4" type="video/mp4" />    </video>    </div>    </section>  </main></Base>
This way, a homepage has been created. Isn’t the development environment clean and tidy? Next, you can use the same techniques to create the About and Works pages, and even a 404 page. The principle is exactly the same!
