前言
在先前的文章提到如何使用 Lighthouse 這款工具監控前端大大小小的最佳實踐,例如:效能、SEO、適用性……等能被客觀測量比較的數值:只要三步驟透過 Lighthouse CI 自動化檢測網站效能,過程中上傳對象設定為 Google 提供的免費暫存伺服器:
upload: target: 'temporary-public-storage' # upload options here雖然很方便但你可能會希望自架 Lighthouse 服務,以便實現:
- 蒐集與管理自己的隱私資料
- 持續性監控同個網站的檢測資料
- 減少依賴第三方伺服器服務
具體來說這篇文章會說明我根據官方文件:The Lighthouse CI Server 實現自架 Lighthouse。
Docker 自架 Lighthouse 伺服器
官方文件提供了 本地自建 與 Docker 兩種方式,基於這是個簡單的小監測功能沒有什麼太複雜的流量或擴張需求,我是直接將 Docker 部屬上 Zeabur 這樣的 Pass 服務,各平台的操作應該大同小異。
建構 Lighthouse 伺服器
- 拿著官方提供的 Docker Image - patrickhulce/lhci-server 到平台上部屬
- 根據官方設定設置
/data為volumes存放永久資料、設置預設9001 port對外開放 - 使用
npx lhci wizard指令初始化 Lighthouse 專案填寫基本資料
$ npx lhci wizard # Use the wizard to create a project.? Which wizard do you want to run? new-project? What is the URL of your LHCI server? https://your-lhci-server.example.com/? What would you like to name the project? My Favorite Project? Where is the project's code hosted? https://github.com/GoogleChrome/lighthouse-ci
Created project My Favorite Project (XXXXXXXX-XXXX-XXXX-XXXX-XXXXXXXXXXXX)!Use build token XXXXXXXX-XXXX-XXXX-XXXX-XXXXXXXXXXXX to connect.Use admin token XXXXXXXXXXXXXXXXXXXXXXXXXXXXXXXX to manage the project.
連結 Lighthouse 伺服器
專案初始化後最終會拿到 build token 與 admin token,根據官方安全性文件提到:
-
build token:允許使用者將新資料上傳到特定項目,但不允許破壞或編輯任何歷史資料。如果專案是開源的,並且想要收集來自外部貢獻者的拉取請求的 Lighthouse 數據,那麼應該公開。 -
admin token:管理員令牌允許使用者編輯或刪除特定項目的資料。管理員令牌只能與受信任的使用者共用,且絕不能放置在 CI 環境中,即使在有外部貢獻者的開源專案中也是如此。任何擁有管理員令牌的人都可以刪除整個專案的資料。
也就是說只要拿著 build token 就能上傳最新的檢測資料了,來到生成 lighthouse 報告的專案設置當中,重新設置 lighthouse upload 相關的屬性:
module.exports = { ci: { collect: { numberOfRuns: 1, startServerCommand: 'pnpm astro preview', url: [ 'http://localhost:4321/en/', 'http://localhost:4321/en/resume/', 'http://localhost:4321/en/work/', 'http://localhost:4321/en/faq/', ], }, upload: { target: 'lhci', serverBaseUrl: 'https://lhci-weweweb.zeabur.app/', token: process.env.LHCI_TOKEN, }, },};再調整一下 CI 要使用到的變數,並且到 GitHub Secrets 添加 build token 為 LHCI_TOKEN。
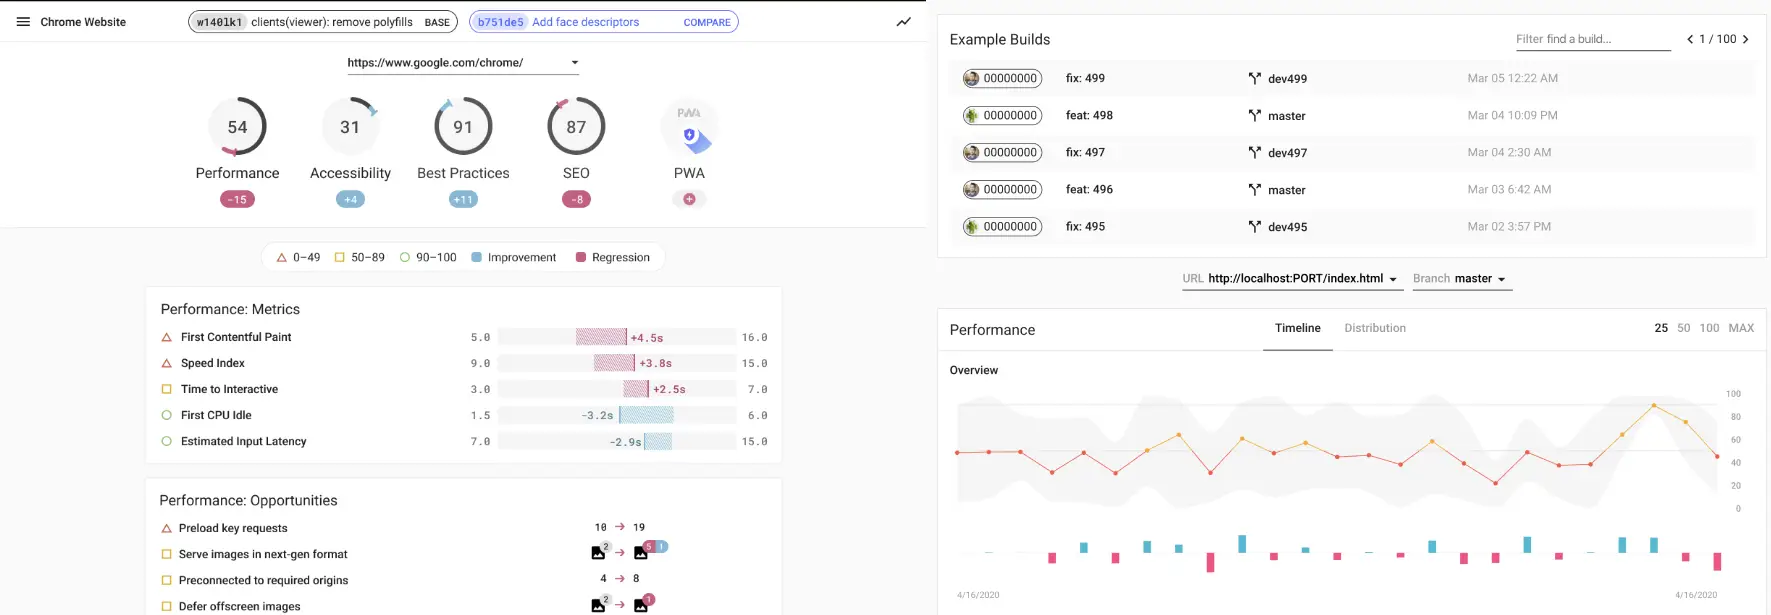
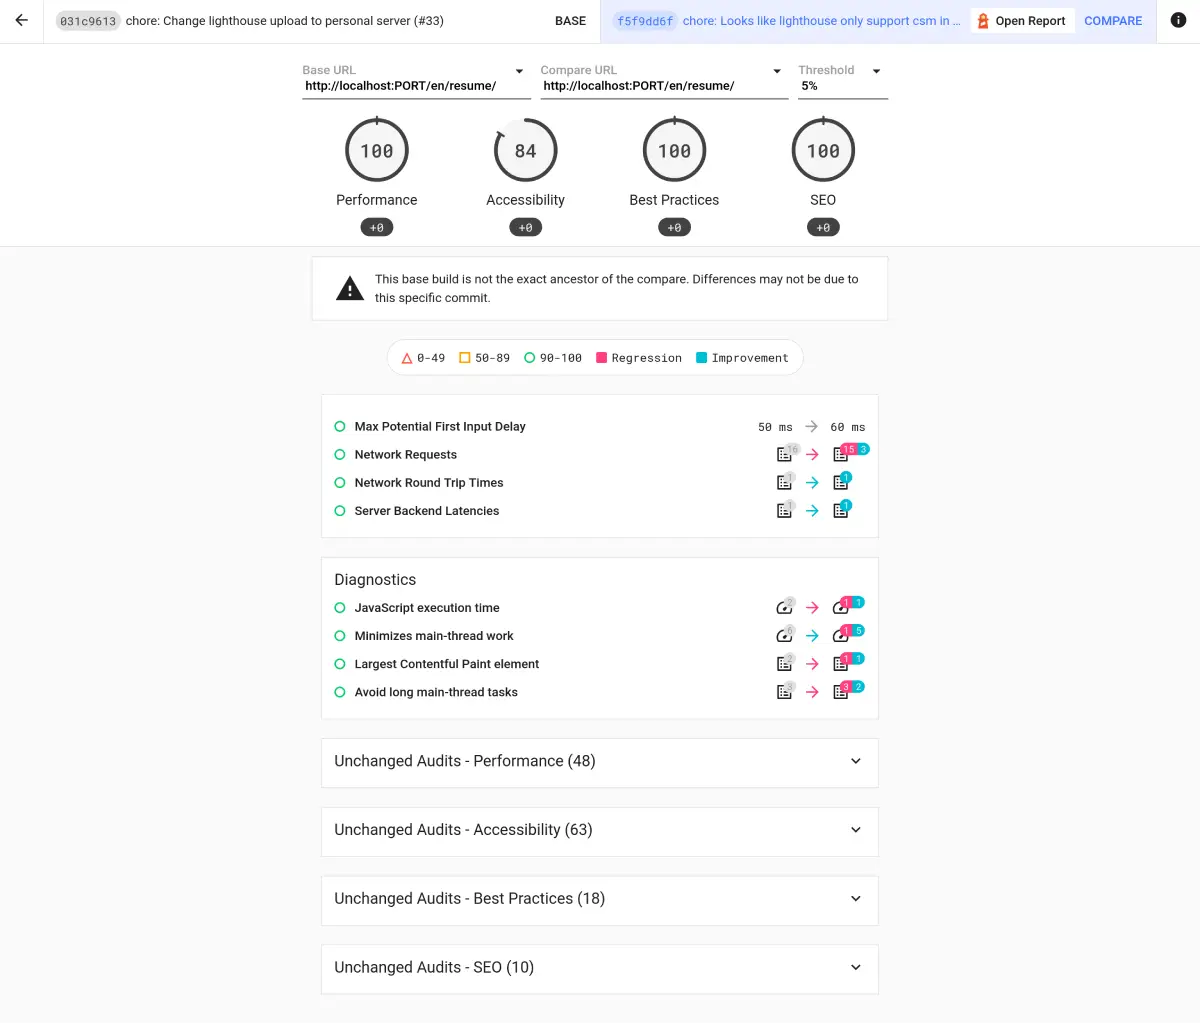
- name: Run Lighthouse CI env: LHCI_TOKEN: ${{ secrets.LHCI_TOKEN }}接著就可以到 Lighthouse 伺服器觀察每一次 CI 提交的資料了。
總結
對我來說自建 Lighthouse 相較於使用 temporary-public-storage 或 PageSpeed Insights 有一個明顯的好處是能夠長期追蹤專案的各方面最佳實踐,而不只專注於單一次檢測的結果,甚至能抓取不同的 Commit 時機查看每項評分的差距,對前端來說可說是酷炸了,長期檢測下來也能讓團隊對於代碼品質有更高的認知與責任心。