Introduction
In a previous article, I mentioned how to use Lighthouse to monitor various frontend best practices, such as performance, SEO, and usability. These metrics can be objectively measured and compared: Chcek Website Performance with Lighthouse CI in 3 Steps. During this process, the upload target was set to Google’s provided free temporary storage server:
upload: target: 'temporary-public-storage' # upload options hereAlthough this is convenient, you might want to self-host the Lighthouse service for the following reasons:
- Collect and manage your own privacy data
- Continuous monitoring of test data for the same website
- Reduce reliance on third-party server services
This article will explain how I set up a self-hosted Lighthouse based on the official documentation: The Lighthouse CI Server.
Docker Self-Hosting Lighthouse Server
The official documentation provides two ways: General and Docker. Since this is a simple monitoring feature without complex traffic or scaling requirements, I deployed Docker on a Platform as a Service (PaaS) like Zeabur. The operations across different platforms should be fairly similar.
Building the Lighthouse Server
- Use the official Docker Image - patrickhulce/lhci-server to deploy on the platform.
- Set up
/dataas avolumesdirectory for permanent data and expose the default9001 port. - Initialize the Lighthouse project by running the
npx lhci wizardcommand and fill in the basic information.
$ npx lhci wizard # Use the wizard to create a project.? Which wizard do you want to run? new-project? What is the URL of your LHCI server? https://your-lhci-server.example.com/? What would you like to name the project? My Favorite Project? Where is the project's code hosted? https://github.com/GoogleChrome/lighthouse-ci
Created project My Favorite Project (XXXXXXXX-XXXX-XXXX-XXXX-XXXXXXXXXXXX)!Use build token XXXXXXXX-XXXX-XXXX-XXXX-XXXXXXXXXXXX to connect.Use admin token XXXXXXXXXXXXXXXXXXXXXXXXXXXXXXXX to manage the project.
Connecting to the Lighthouse Server
After initializing, you will receive a build token and admin token. According to the official security document:
-
build token: Allows a user to upload new data to a particular project, but does not allow the destruction or editing of any historical data. If your project is open source and you want to collect Lighthouse data on pull requests from external contributors then you should consider the build token to be public knowledge. -
admin token: Allows a user to edit or delete data from a particular project. The admin token should only be shared with trusted users and never placed in the CI environment, even in open source projects with external contributors. Anyone with the admin token can delete the entire project’s data.
This means that as long as you have the build token, you can upload the latest test data. In the project settings for generating Lighthouse reports, adjust the properties related to lighthouse upload:
module.exports = { ci: { collect: { numberOfRuns: 1, startServerCommand: 'pnpm astro preview', url: [ 'http://localhost:4321/en/', 'http://localhost:4321/en/resume/', 'http://localhost:4321/en/work/', 'http://localhost:4321/en/faq/', ], }, upload: { target: 'lhci', serverBaseUrl: 'https://lhci-weweweb.zeabur.app/', token: process.env.LHCI_TOKEN, }, },};Next, make adjustments to the variables used in CI, and add the build token as LHCI_TOKEN in GitHub Secrets.
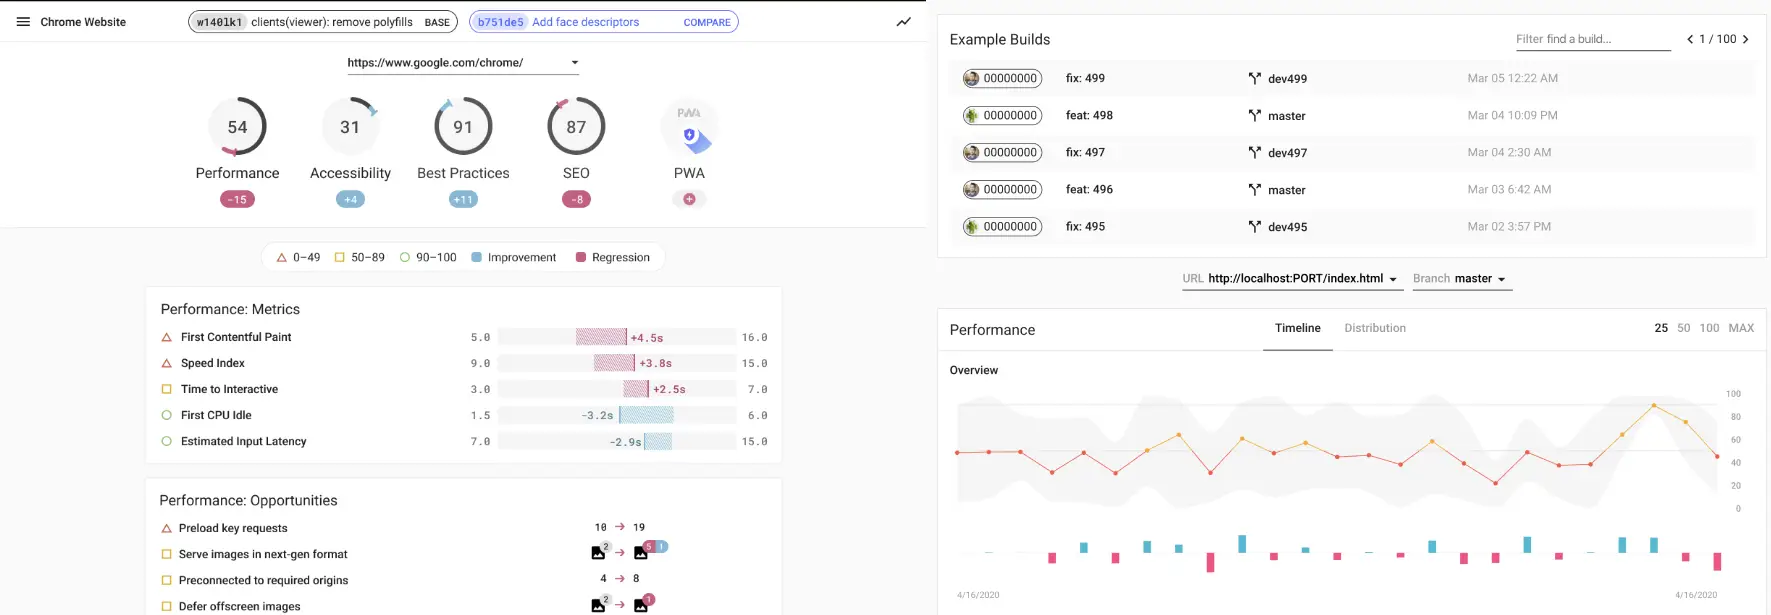
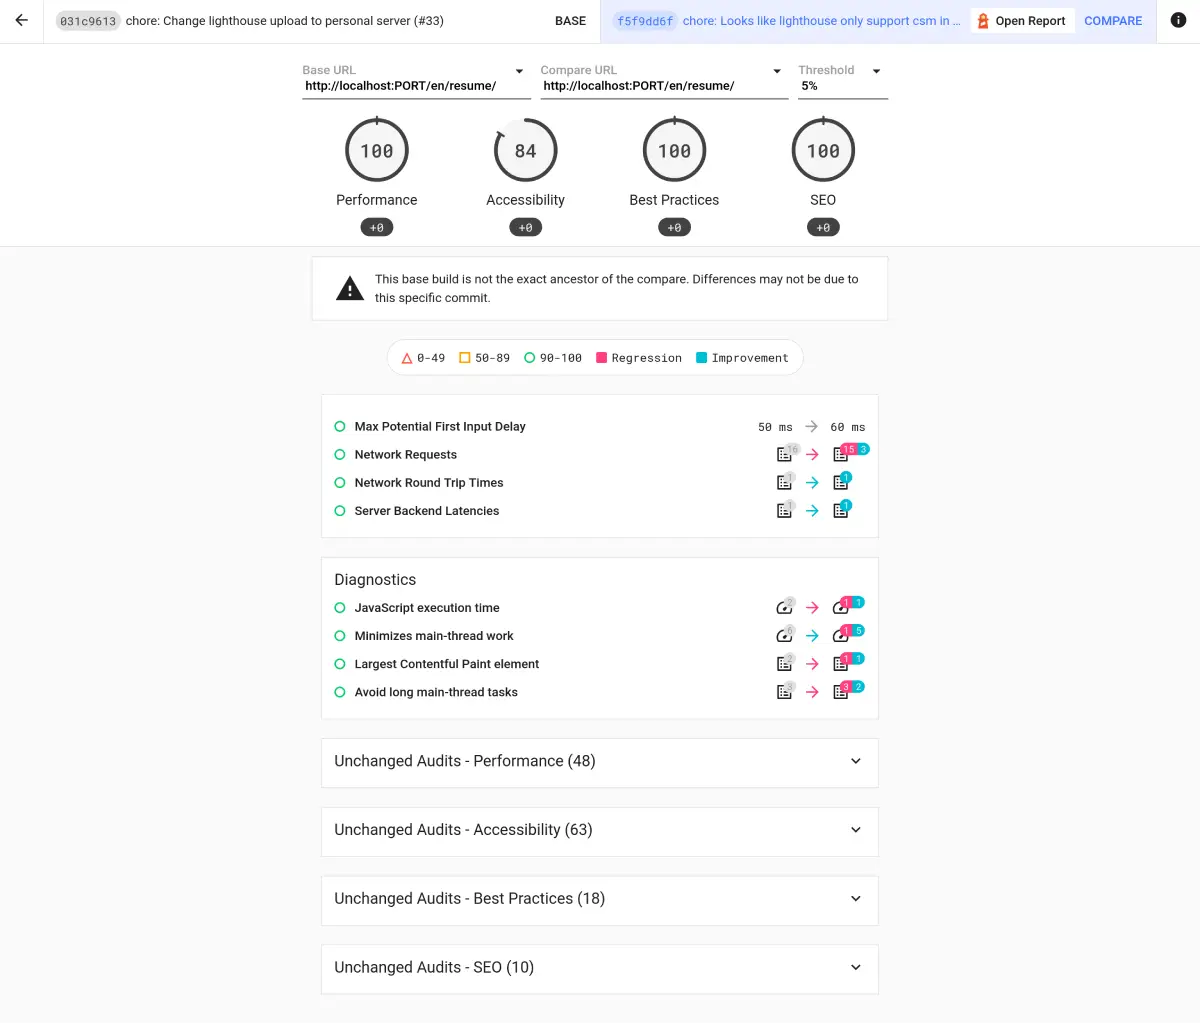
- name: Run Lighthouse CI env: LHCI_TOKEN: ${{ secrets.LHCI_TOKEN }}You can then observe the data from each CI submission on the Lighthouse server.
Conclusion
For me, self-hosting Lighthouse offers a clear advantage over using temporary-public-storage or PageSpeed Insights. It allows for long-term tracking of various best practices in the project rather than focusing solely on the results of a single test. You can even capture differences in scores during different commit stages. This is incredibly beneficial for frontend developers, as it enhances the team’s awareness and responsibility regarding code quality over time.