Build a Minecraft Server on AWS EC2 Using Docker
Introduction
Minecraft is one of the world’s most famous sandbox games. In the past, when playing this game with friends, we connect through a personal computer’s local area network (LAN), using Hamachi to simulate the LAN connection, but there were obviously various limitations.
This article explores the aim of quickly setting up a private MC server using different technologies (AWS EC2, Docker):
- Stable independent dedicated servers
- Broader and faster scalability
- More flexible and faster server building
Create EC2 Virtual Server
Amazon Elastic Compute Cloud (EC2) allows us to set up machines with specific configurations in the cloud, which can be adjusted according to demand. The following process is similar to the official blog example:
- Log in to AWS Console
- Select the region where the server will be deployed (Tokyo
ap-northeast-1Asian server) in the upper right corner - Search for the EC2 service and enter Dashboard, then click Launch Instance
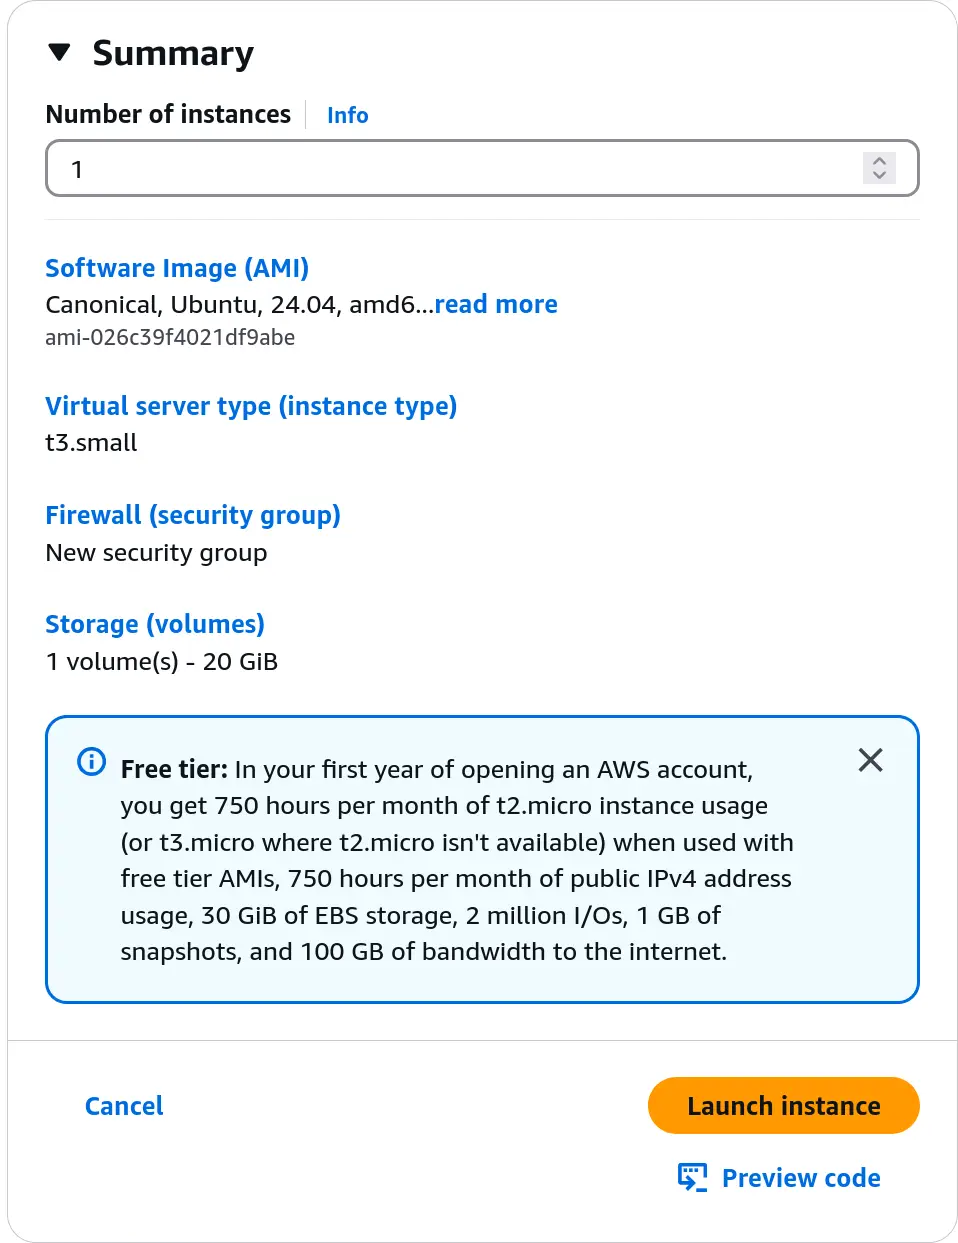
- Give the new EC2 instance a name (minecraft) and select the operating system image (Ubuntu Server 64-bit x86)
- Choose the EC2 instance type; upgrading the hardware specifications later is not an issue (t3.small)
- Create a new key pair for convenient future SSH access to the server (default, name is arbitrary)
- In Network settings, turn off Auto-assign public IP (optional; to ensure the server IP is stable rather than temporarily assigned, you can set Elastic IPs later)
- In Network settings, add Security group rule 2 (TCP, 25565, 0.0.0.0/0) to allow the Minecraft port 25565 to pass through
- In Configure store, select the appropriate capacity (20 GB)
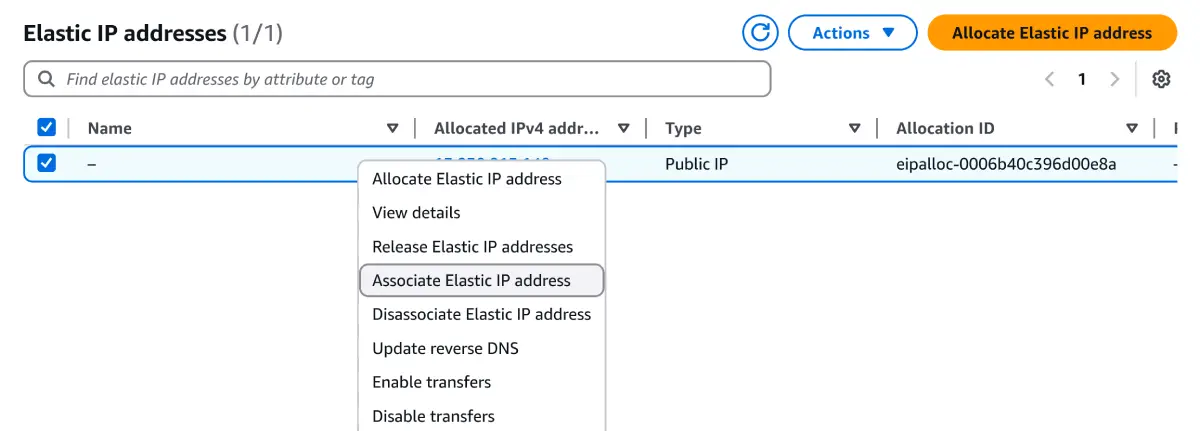
Set Up Elastic IPs for Fixed External IP
If you previously turned off Auto-assign public IP, you will need to use Elastic IPs to achieve a fixed external IP.
- Allocate Elastic IP address (default Allocate)
- Associate Elastic IP address (select the instance created earlier)
Once completed, the Public IPv4 address should be present in the instance details.
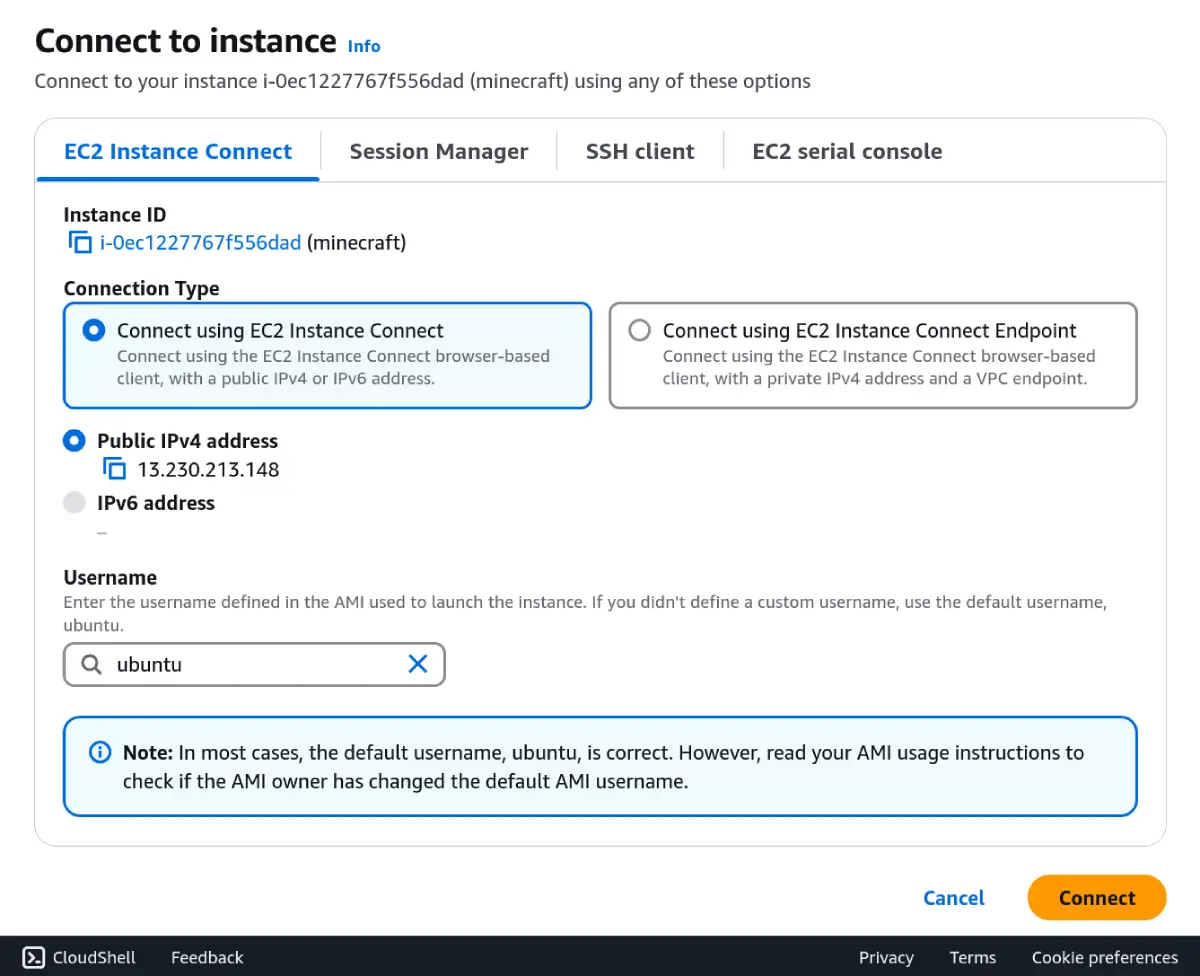
Access EC2 Instance
You can connect using various methods; here we’ll directly use EC2 Instance Connect in the browser. If connecting via SSH, the key pair set earlier will come into play.
- Select the instance
- Connect
- EC2 Instance Connect
Configure EC2 Instance
- Update packages
sudo apt update - Install Docker - Install using the apt repository
- Manage Docker as a non-root user
Run Minecraft Docker Image
# Create and enter mc-docker directorymkdir mc-dockercd mc-docker# Create docker-compose.ymlnano docker-compose.ymlSet up the corresponding Docker image according to itzg/docker-minecraft-server.
services: minecraft:    image: itzg/minecraft-server    container_name: minecraft    ports:      - "25565:25565"    environment:      EULA: "TRUE"      VERSION: "1.21.5"    volumes:      - mc-data:/data    restart: unless-stopped
volumes:  mc-data:
Run:
docker compose up -ddocker compose logs -fSummary
If you’re not familiar with Minecraft servers, you can first set up a Docker container locally to try it out. Once confirmed, it can be easily deployed on EC2.
- For backup requirements, you can refer to docker-mc-backup
- For sending server commands within Docker, refer to
itzg/minecraft-server’s Sending commands - For installing mods and plugins, refer to Working with mods and plugins, which has excellent support for automatically fetching mods from CurseForge and Modrinth.
Further Reading
- HOW TO RUN MINECRAFT ON DOCKER | RUNNING MINECRAFT IN PRODUCTION PART 1 - The_Sudo
- Setting up a Minecraft Java server on Amazon EC2 - AWS
- Cost optimize your Minecraft Java EC2 Server - AWS