Introduction
OBS stands for Open Broadcaster Software, a popular recording software in the open-source community. Today, let’s understand how to use this recording software through simple illustrations. My hardware configuration is as follows:
- Monitor: VX3211 - 4k
- Graphics Card: GTX 1060 6G
- Microphone: Blue Snowball
- Operating System: Windows 10
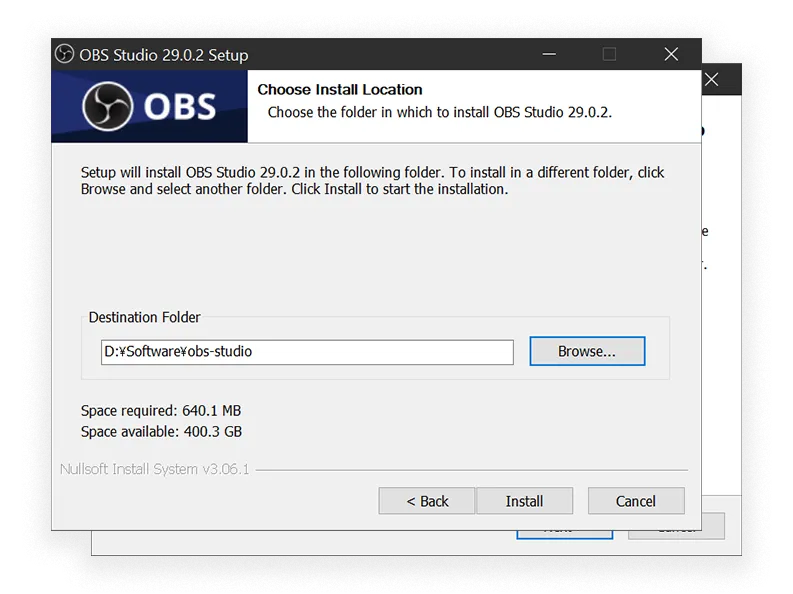
Installing OBS
First, you can go to the official website to download the latest version, which supports all major operating systems.
Automatic Default Settings for OBS
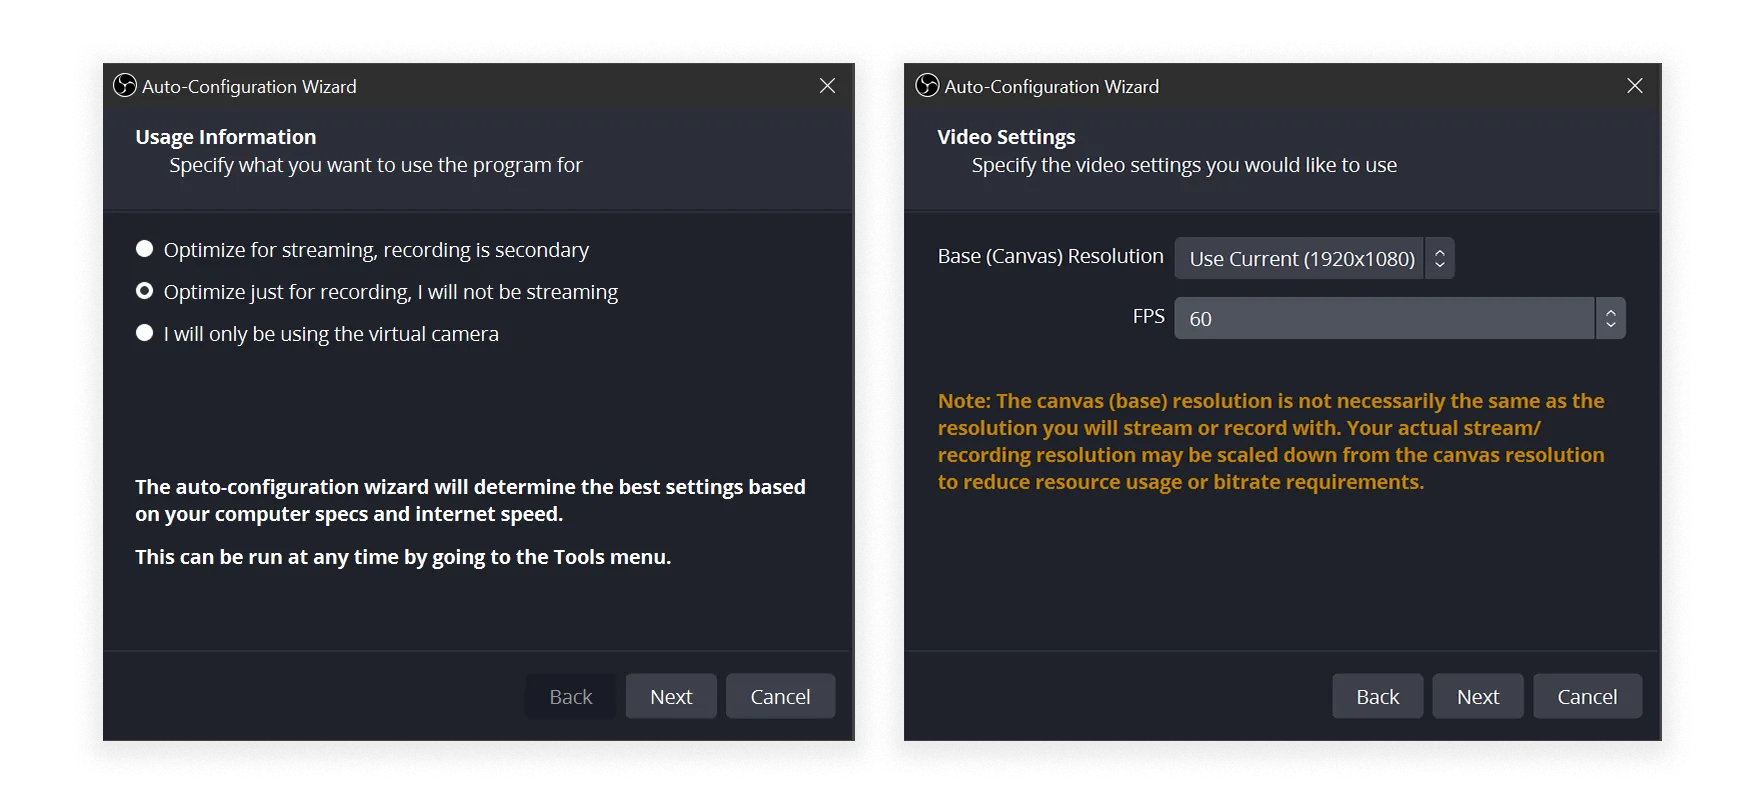
After installing, you will find a helpful “Auto-Configuration Wizard” asking you about the purpose of installing OBS:
- Optimize for streaming, recording is secondary
- Optimize just for recording, I will not be streaming
- I will only be using the virtual camera
Here, I choose “Optimize just for recording, I will not be streaming.” If you have needs for live streaming or using a virtual camera, you can select other options. This way, it will set up the best default settings for your intended purpose right from the start. If you want to configure it yourself, you can still modify it later in the settings. The second step is to choose the output screen resolution and FPS (frames per second).
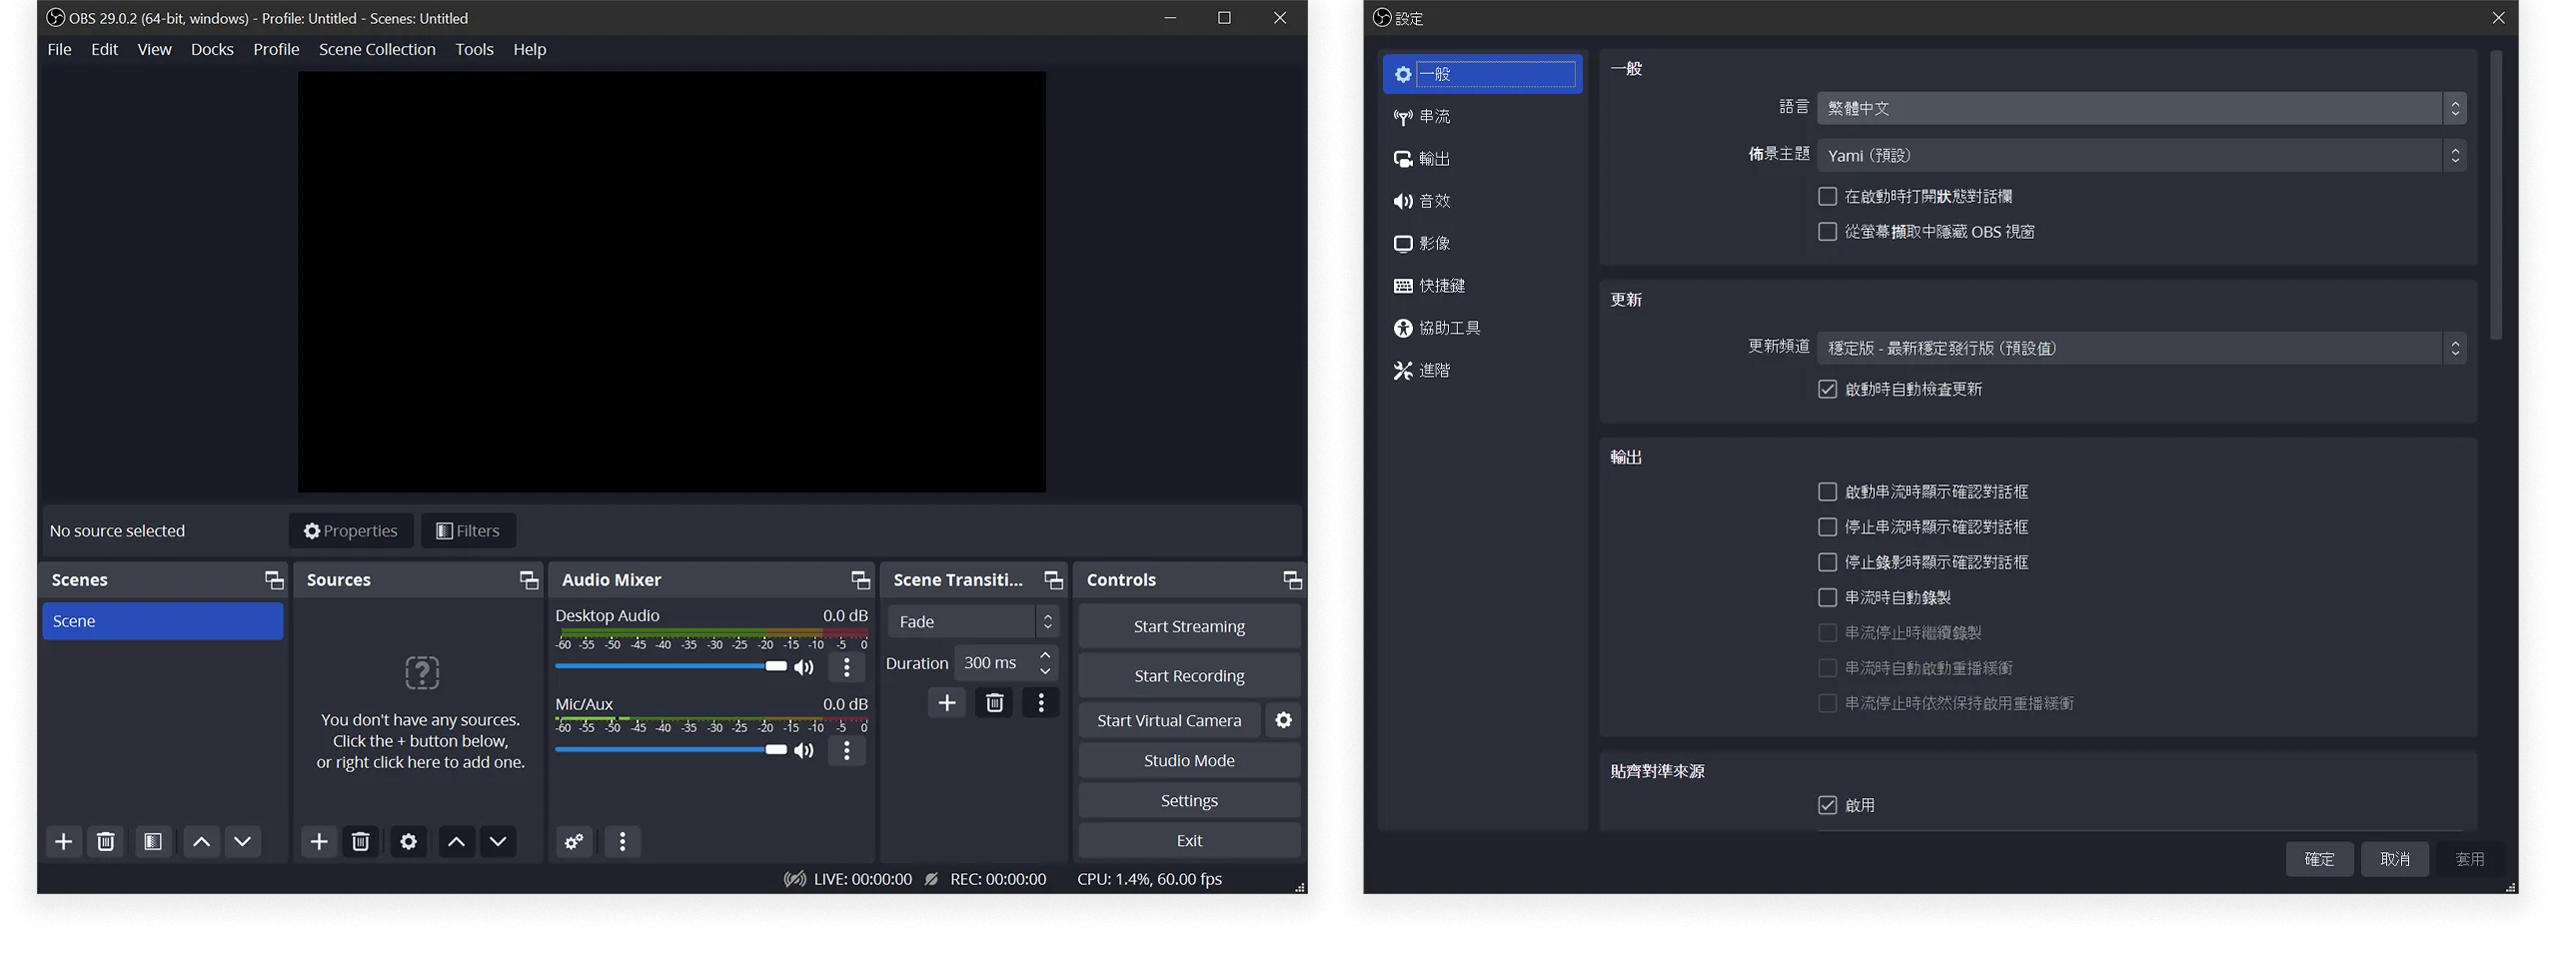
Step One: Personalize OBS
Even after the auto-configuration, the first step is to go to the bottom right corner and click the Settings button to enter the settings page. Change the language to Chinese so you can see a familiar Chinese interface. You can also choose a pleasing software theme in the Theme option.
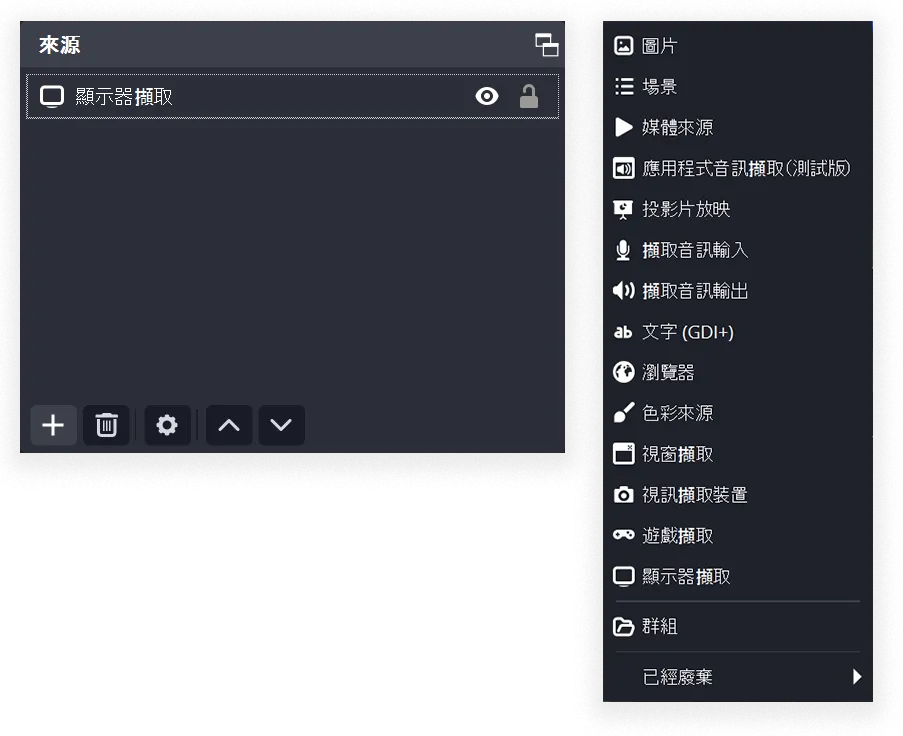
Step Two: Add Sources to the Scene
The scene is like a stage, and the sources are the props displayed on the stage. There are many props available by default, such as adding a Display Capture source, which allows you to display the screen content in the scene.
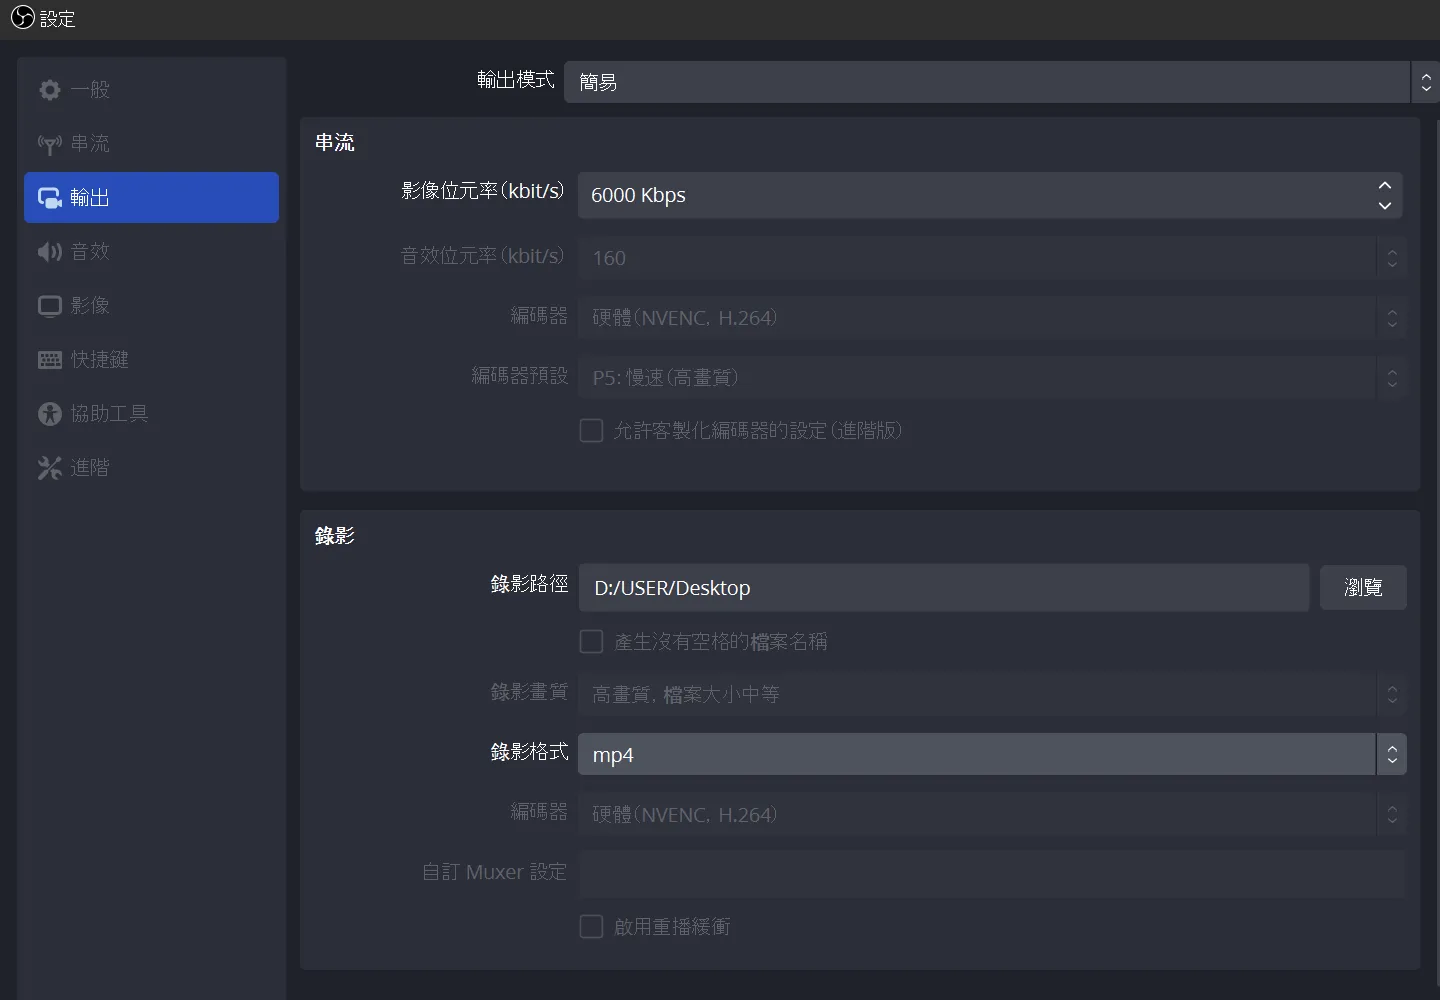
Step Three: Set Output Details
For convenience, I will set the recording path on the desktop so that I can easily find the recording files there. The file format is set to mp4, and I will configure the related settings according to YouTube’s recommended video bitrate, as my videos are all intended for YouTube.
Step Four: Start Recording
Now, just press the Start Recording button to begin recording. If you want to stop recording, you can press the Stop Recording button. Of course, you can also set any action in the shortcuts within the settings!
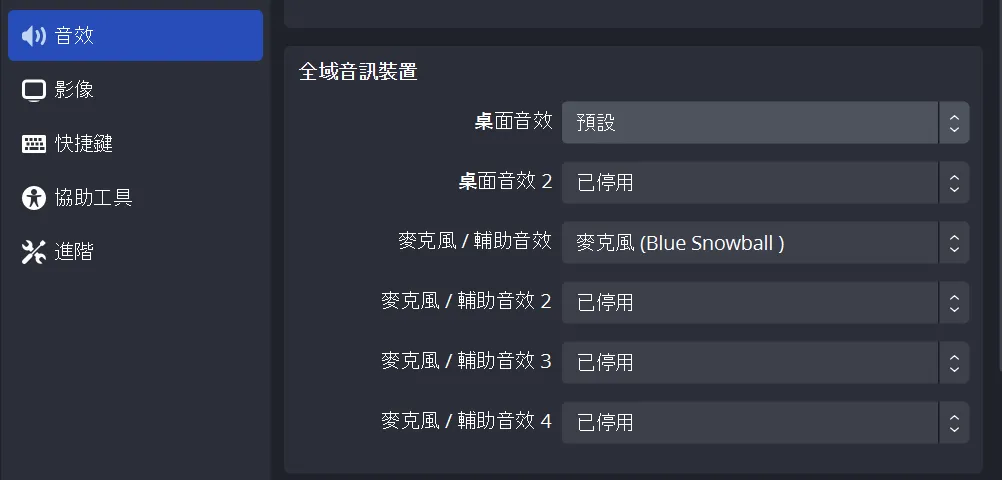
Additional Settings: Microphone
Although OBS automatically detects the microphone in use, it did not correctly detect it during this operation. Therefore, you still need to go to the audio settings and select the microphone you are using.
Conclusion
Recording is not as complicated as it seems. In fact, most of the settings in OBS are already handled, allowing you to focus more on the content being recorded. I hope this article can help those in need.