Learn to Use Hoppscotch for API Testing (with Images)
Introduction
Given that many students tend to jump straight into coding as soon as they receive backend documentation, they often overlook various issues while coding, such as incorrect request methods, missing parameters, wrong URLs, and non-existent data. Therefore, I always recommend getting familiar with ready-made tools for testing APIs first. Using a graphical interface allows for more intuitive management of APIs and limits debugging to a single API rather than the entire website.
This article will illustrate how to use Hoppscotch, a popular open-source online tool, to demonstrate testing APIs.
First Use
Login is Not Required
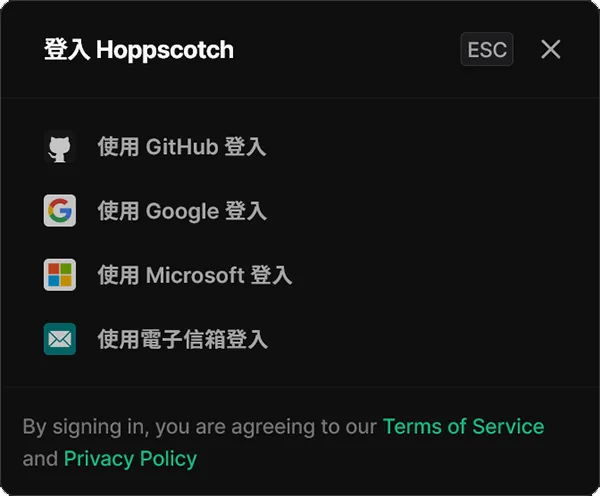
When you enter the Hoppscotch website, you’ll find that it doesn’t require you to log in and has no cumbersome settings. The instant usability is the main reason I love using it 🤗. If you want to log in, you can click the Login button in the upper right corner to use GitHub, Google, Microsoft, or Email. Logged-in accounts can save personalized settings in the account rather than in the browser’s history.
Personal Settings
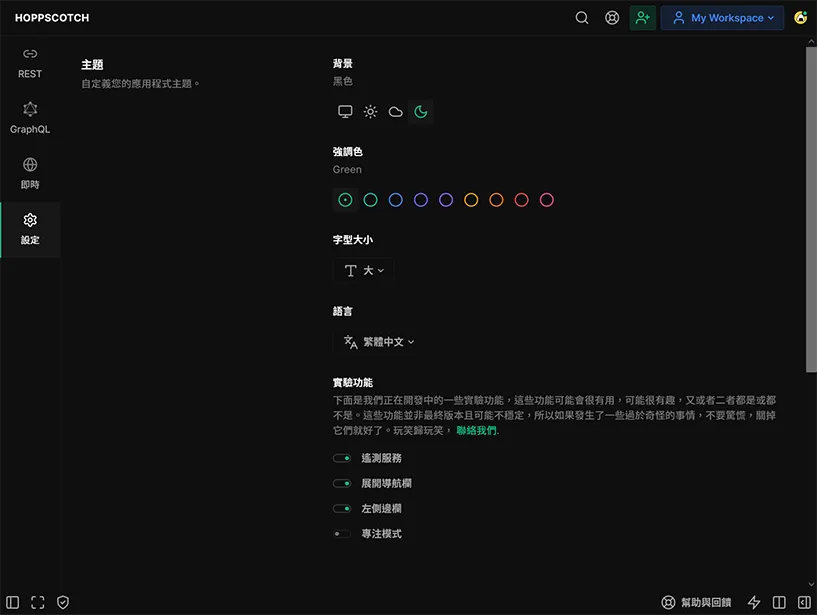
Clicking the gear icon on the left side will take you to the settings panel where you can set preferences such as language, accent color, font size, experimental features, etc. There are many language supports and theme options available for you to adjust according to your preferences.
Testing API
Create a New Request
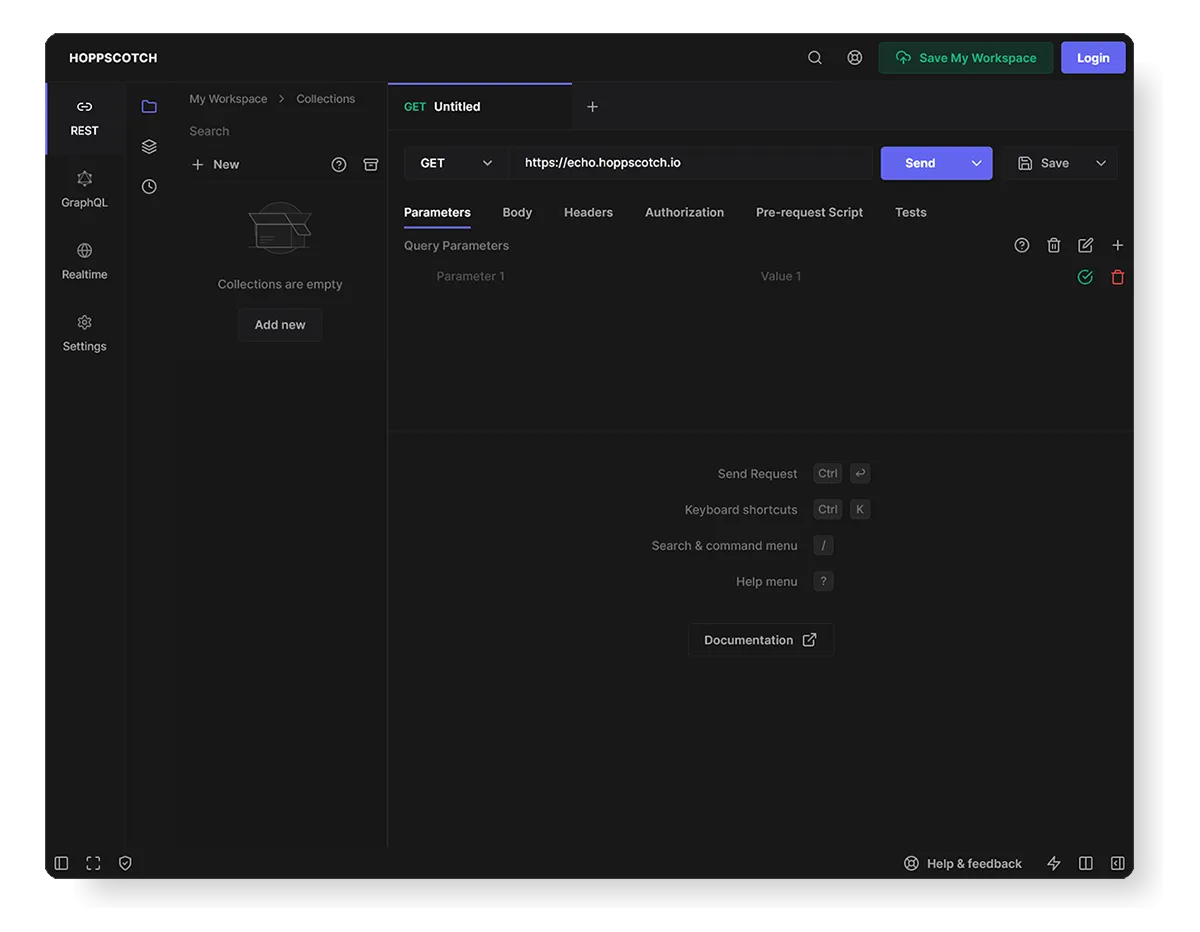
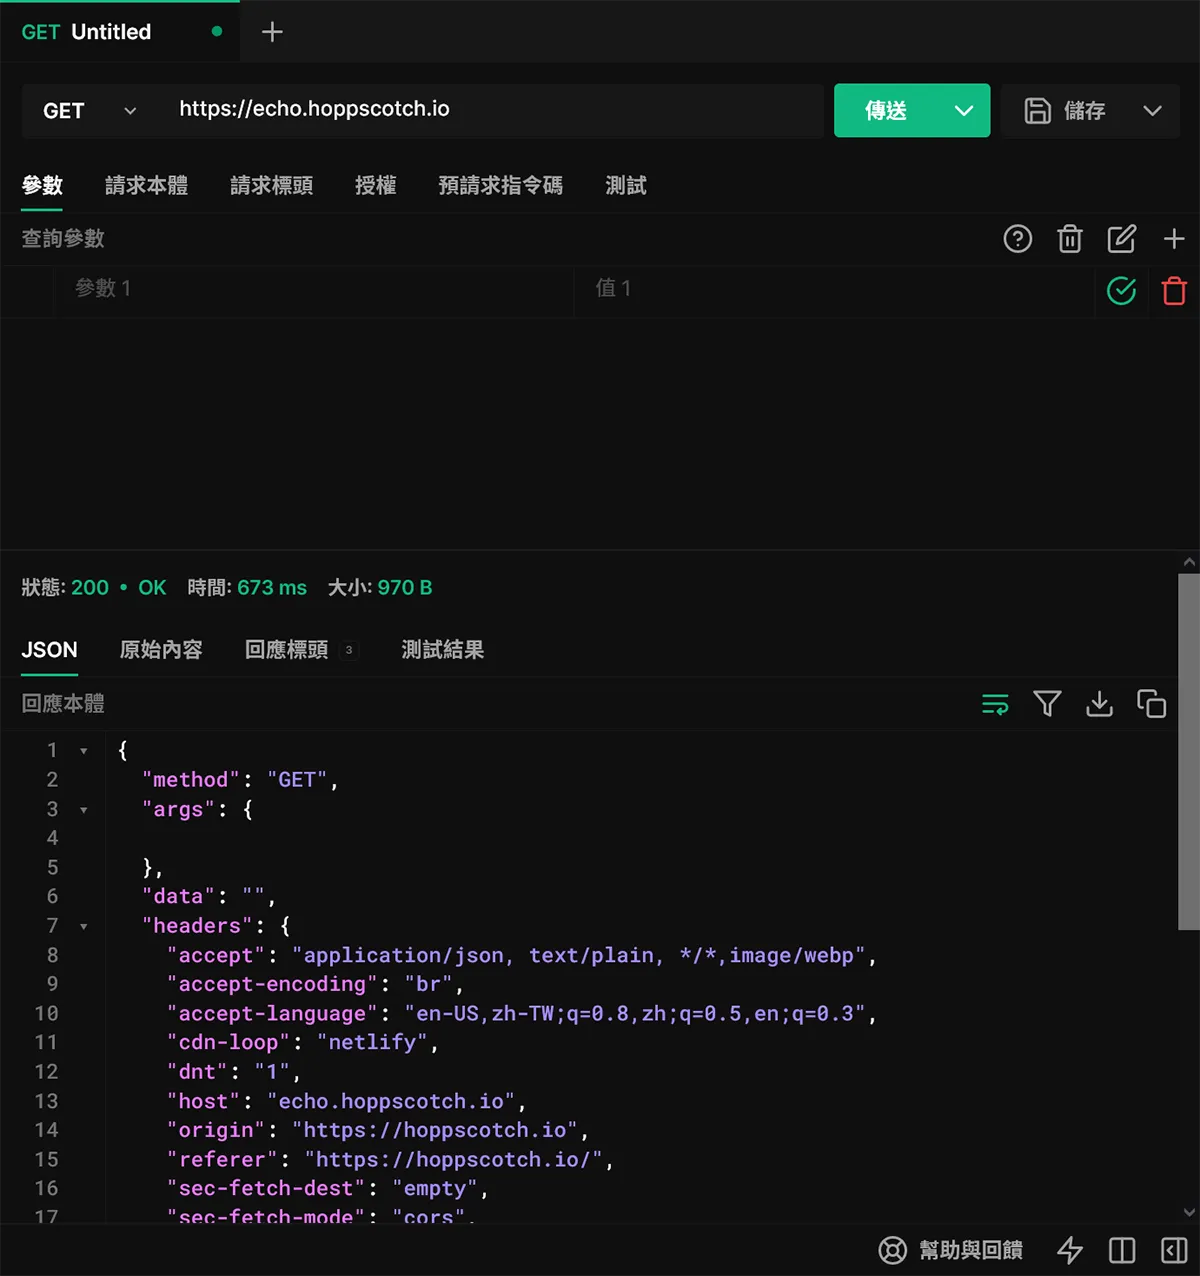
Let’s use the official example for testing: enter https://echo.hoppscotch.io into the URL field, use the GET method, and click send request. Just like that, you’ve successfully made a GET request using Hoppscotch!
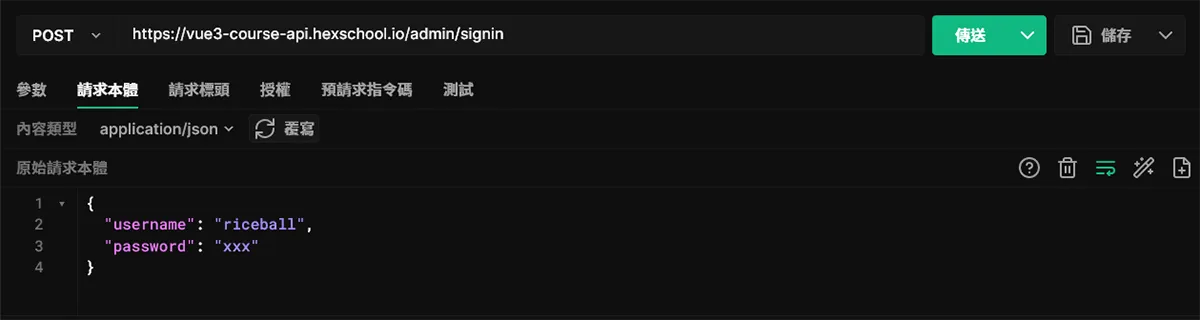
Add Parameters
Of course, the previous GET is a very simple example. We can include more information in the request, whether it’s the content of the body or the information in the header, all can be set within the tabs. Any details of the request can be adjusted.
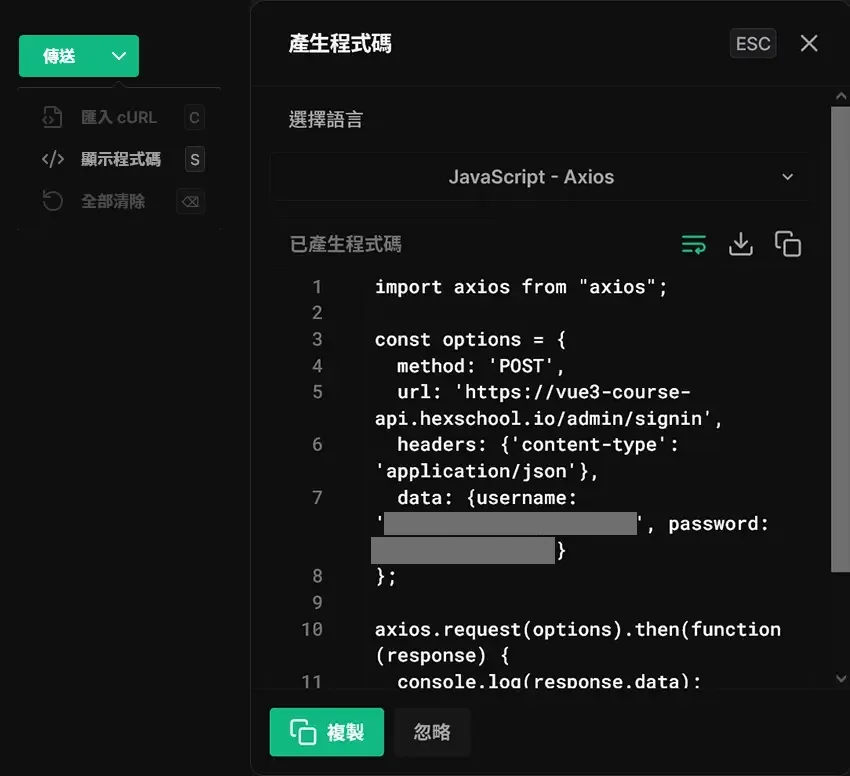
Generate Code
Once you’re sure the request content is correct, you can click the small arrow next to send > Show Code button. Hoppscotch will generate code for you, which you can directly copy into your actual project. In the example, I chose to generate a request using the Axios library, saving you from writing code!
Advanced: Save Requests
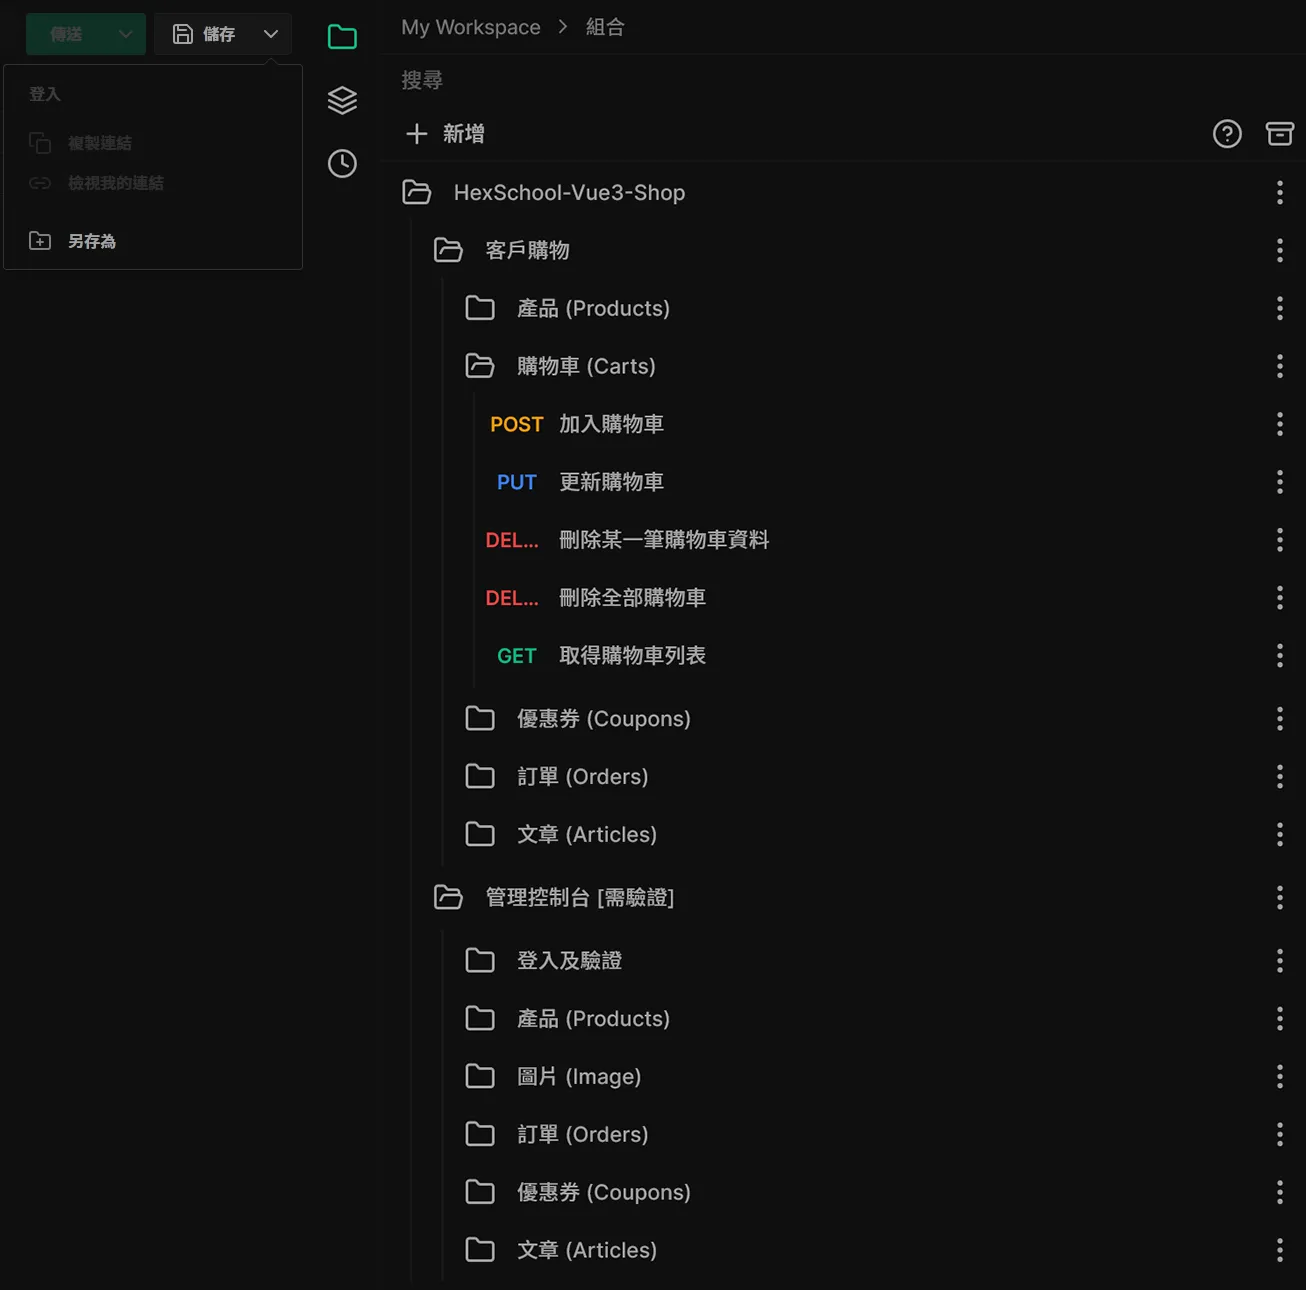
Sometimes, a larger website may have many APIs, and having to reset everything each time you want to test can be very tedious. Therefore, you can use the Collection feature to manage your requests. Just click Save > Save As to bookmark the request, and you can find it later in the bookmarks on the left side. Especially when building large projects, categorizing and saving each API not only makes testing easier but also feels great 😎.
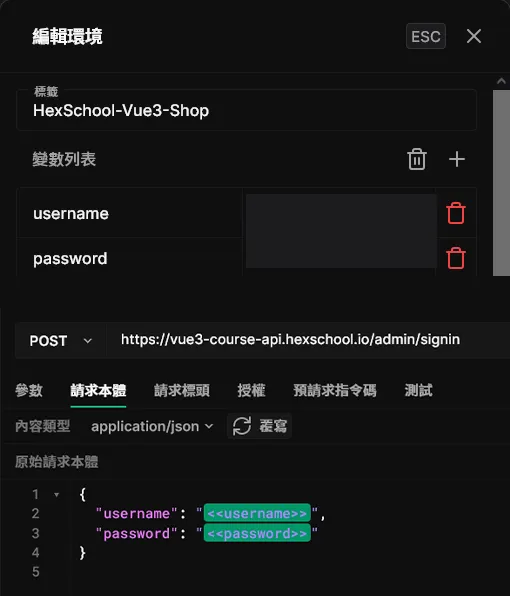
Advanced: Using Environment Variables
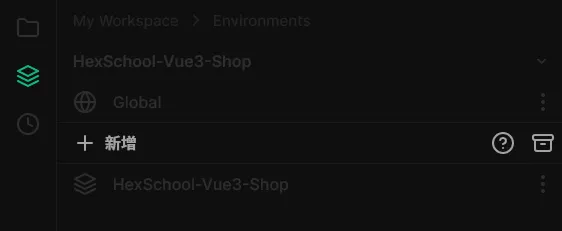
Under the collection button is the environment variable settings, where you can set some commonly used variables, such as your API server URL, API key, user token, etc. This way, you can directly use the variables during testing, allowing for centralized management of sensitive data without fear of exposure.
Once the environment variables are set, you can use the variable by writing <<variable name>> wherever you want to reference it.
Summary
Hoppscotch is a very useful open-source API testing tool, with over 50k stars on GitHub. If you need to test APIs, this will be my tool of choice.